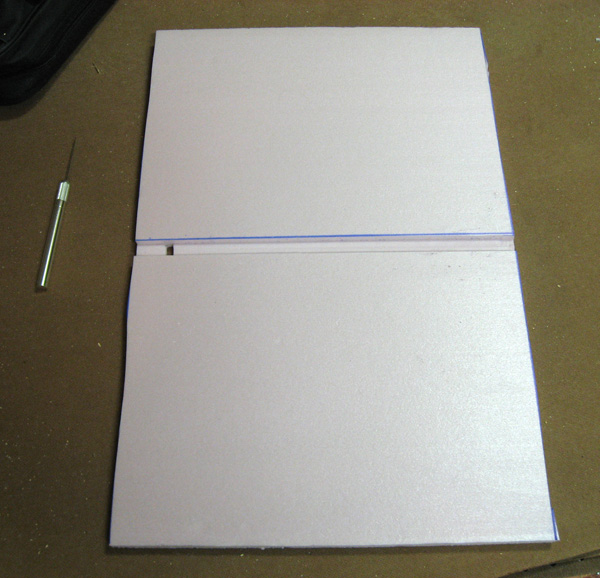
To get the panels attached neatly to the bicycle chain, you will need more foamboard. You used 1.5 sheets for the rocks, now use the other 1.5 sheets to cut ten, 15" tall squares. Now, if you were going to do this right, you would use two parallel bicycle chains to move your panels. That would require some precision measuring and I was being lazy, so I just used one. One worked, but two would have been better. Before you cut the foam board, draw a line down the center (or two lines if you are going double chain) and use a router to cut a straight 1/4" trench about halfway through the foam board. This trench will be a guide for the chain. Cut the sheet into 15" panels and cut a small hole near the top all the way through the foam board. This little hole will make your life much easier later on.
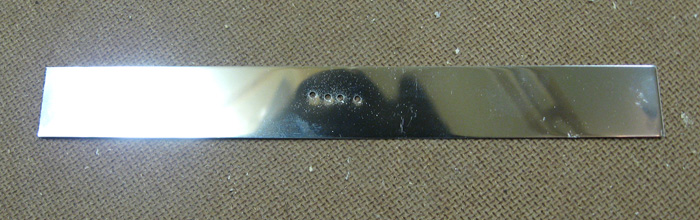
I bought some thin metal bands from a hobby shop (I think they are used in making model planes), cut them into 4" strips and drilled a few small holes in the center. This will be wired to the chain.
This can now be wired onto the chain. I used two wires, attaching one wire to each side of a link. That way, I did not obstruct the gear tooth as it rooled by.
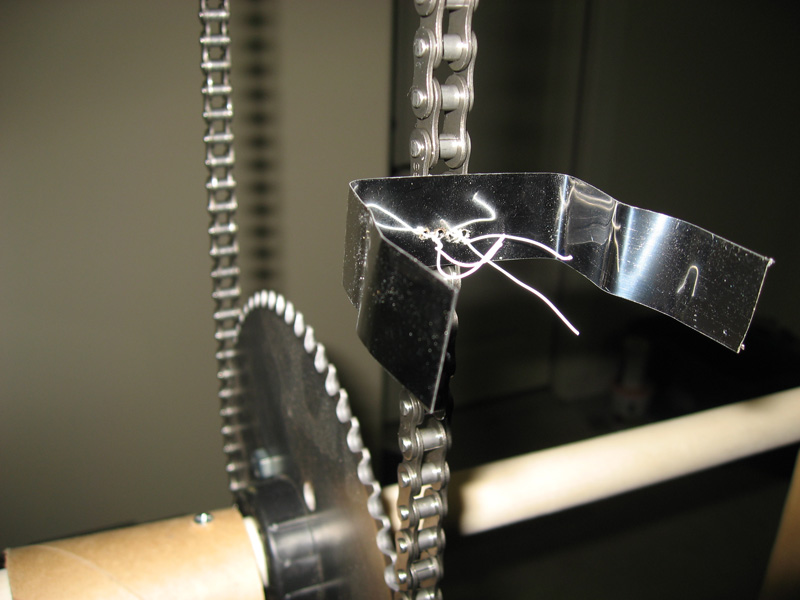
Sorry I don't have a picture of the intermediate step but you are now going to bend the metal clasp back to conform with the chain, bend the wings back then punch them through the board. Here is a cartoon of what I am talking about. I found that it was easier to bend the clasp around the chain, make an M shape and push the metal strips through the foam board, bend the tips back like a paperclip, THEN wire the metal clasp to the bicycle chain. That is the purpose of the hole so that you can wire the clasp to the chain after the clasp is attached to the foam board. Don't wire it too tight. You want just a little play between the wire and the clasp.

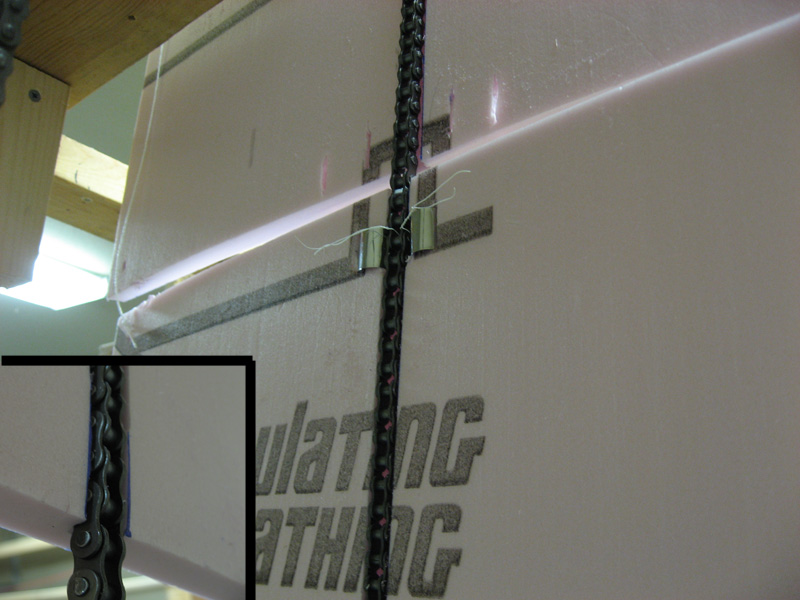
Here is what it looks like when it's done. You can see that the clasp is holding the board near the very top of the board (there are two boards in this picture) and the chain is running up into the tench I routed.
If you look over to the left side, you can see a string that is attached to the top of the bottom board that runs up to the top of the top board. There is a string like this on both the left and right side. Since I used only one chain, the boards can twist. This string helps keep the boards from twisting, but I had to attach them from top-to-top. If I attached them top-to-bottom, the string would rip out when a board rounded the gear. The boards run on the outside of the chain loop. Once they where attached, I glued the the stone panels to these guide panels. To hide the gaps between the panels, I staggered them so that the stone panel hung down about two inches below the guide panel (as shown below). I used clamps to hold the panels together while the glue was drying and I glued them just a few at a time.
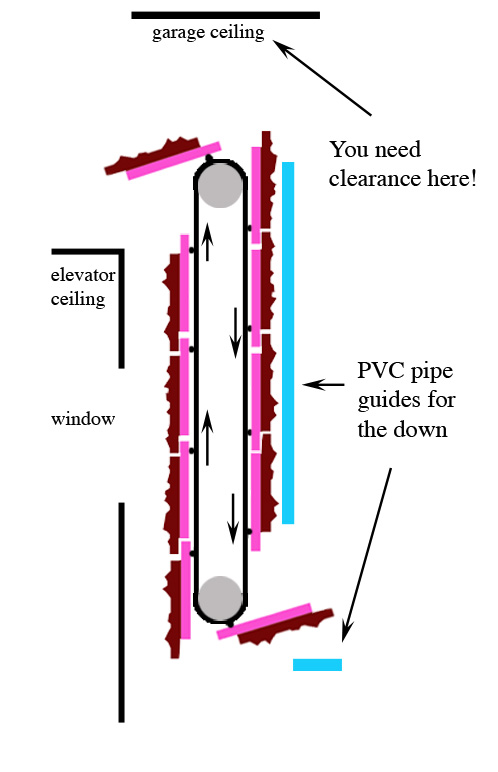
The last thing I needed was some PVC pipe to keep the panels on the return (down) side from flopping over. I needed one set running most of the length of the return side and one small section at the bottom. Since the panel is attached at only one point on the chain, gravity will take over on the down and try to flip the panel. The PVC pipe will stop this until the panel reaches the bottom gear. The panel should then be allowed to fall 90 degrees, then 90 degrees again on its way up. Sorry, I don't have a good picture of this setup. Why not just attach them at the center of the panel so they don't flop? Then I would not be able to stagger the stone panels from the guide panels and you would see a gap. You definitely need to give yourself time to put this together to work out the kinks.
Next Page