Elevator Simulator 3.0
I had made a few elevator simulators, but none of them had really lived up to my standards. So, I had to try it one more time. This haunt was really an excuse to make another and , this time, do it right. There were two elements I was perfecting here. The first was the use of rotating panels. I tried twice and failed with those. This time I was going to get it right. The second element was the quick change of the room so that the room leading to the elevator is a completely different room from the one leaving the elevator. I didn't want just different walls. I wanted the whole room to change.
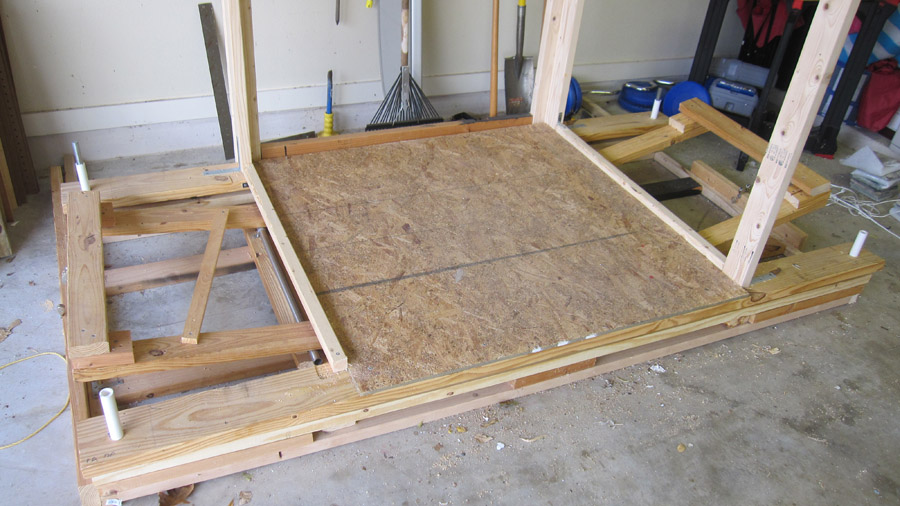
Let's start with the elevator itself. This part should look familiar. It is smaller than what I have built before (this one had a floor that was only 4'x4') because I wanted to send only four people through at a time. Other than the size, the frame looks just like the 2006 and 2008elevators. As a matter of fact, you might recognize those long boards as the very same boards I used for the 2008 elevator. If this is the first time you are looking at my elevator tutorials, you should start by looking at those pages.
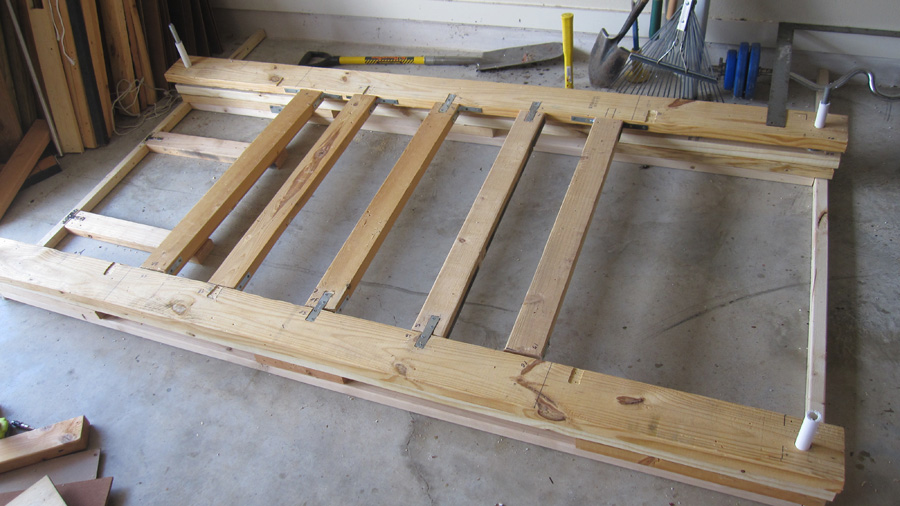
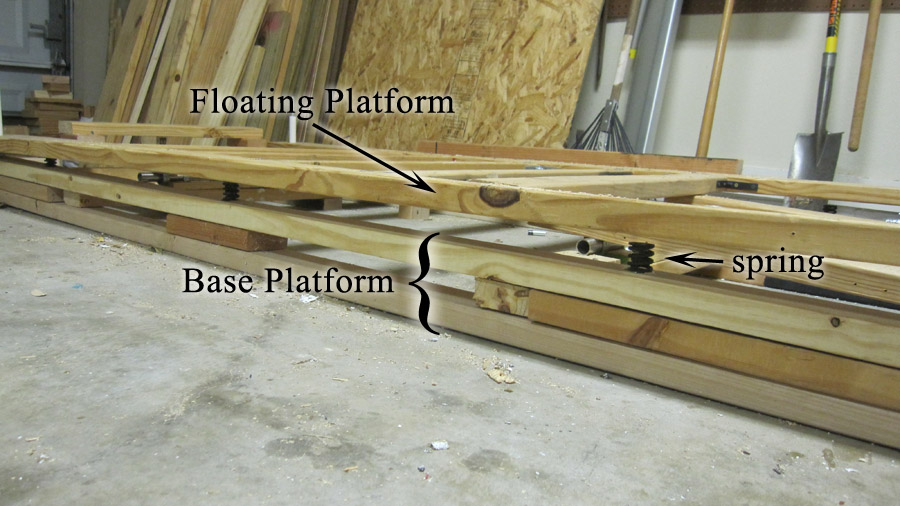
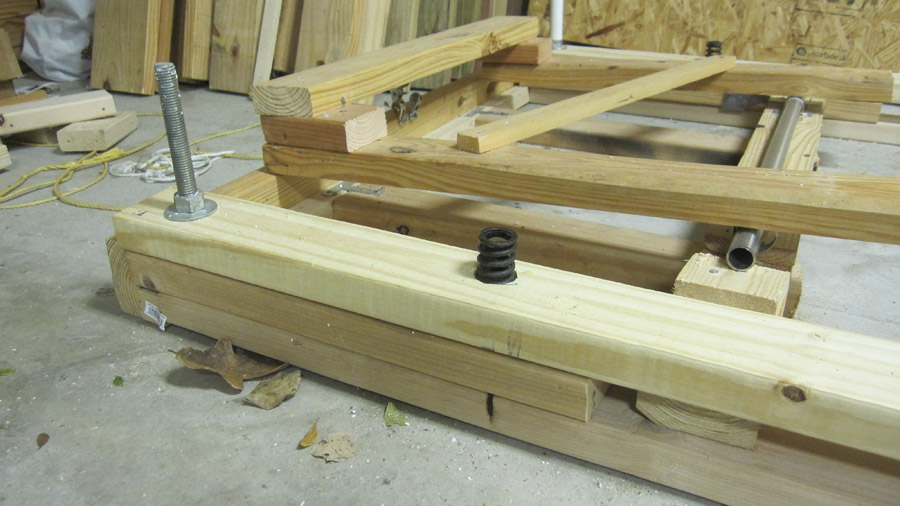
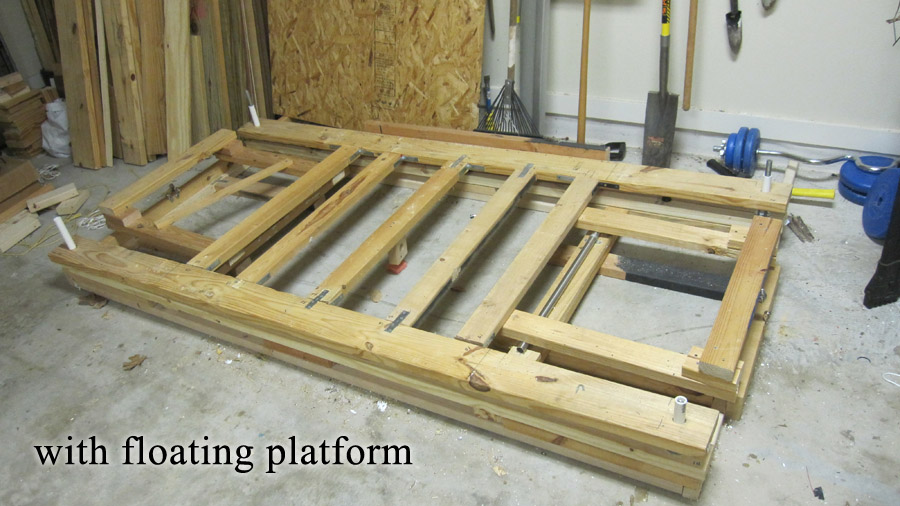
So, I did the same thing as before. I made a base with springs and four guide pins and put a "floating platform" on top of the springs.
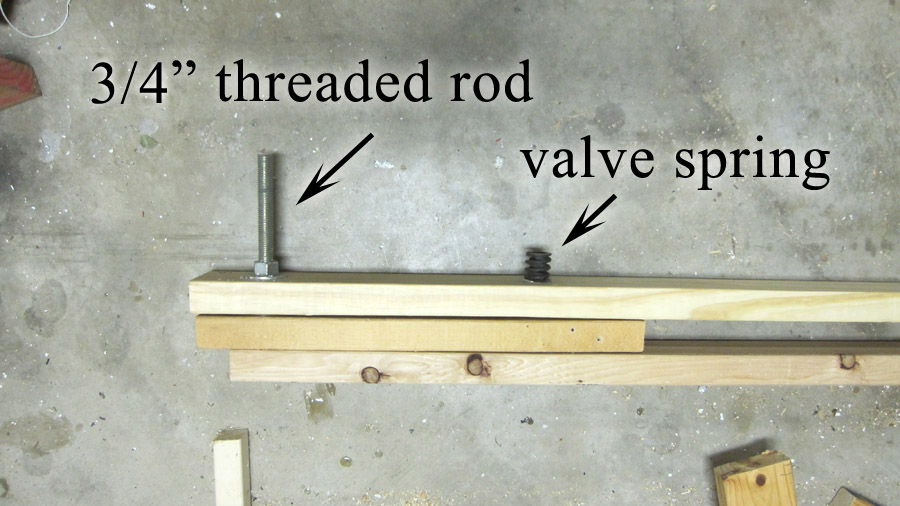
As so not to get bored, I then added a new element. I wanted this elevator to start with a drop. Not much of one, mind you. Sure, it would be fun to drop the kids 6" onto some springs, but there would be adults going through as well and you never know about bad backs, bad necks and what sudden, panicked jerks they might make to throw their vertebra out of whack. Better to drop them just one inch so that it is startling, but very gentle on the body.
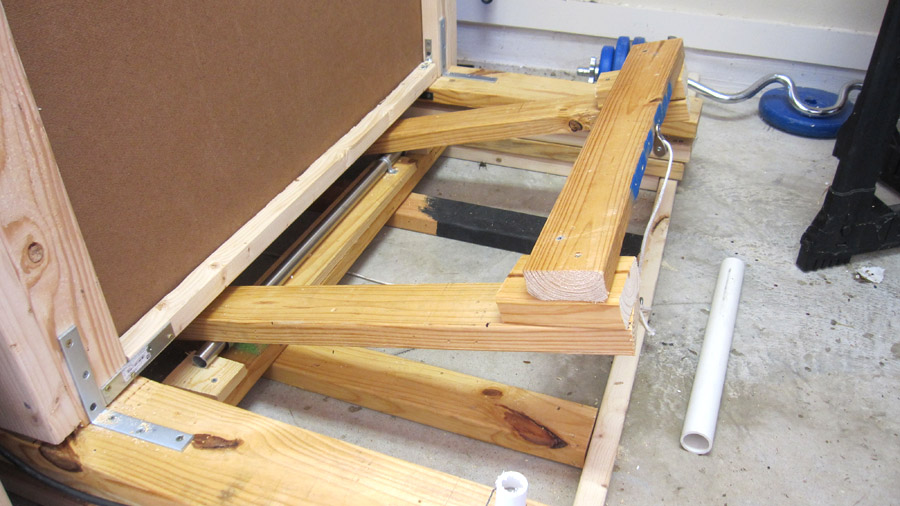
So, to make the drop, I built two wedges to lift the elevator and passengers one inch above the springs. While we are here, let's talk a little bit about physics. If I have four adult passengers who weigh 200 lbs each plus a 100 lbs elevator, I have to lift 900 lbs! Not a problem if you stayed awake during your high school physics class. Leverage is your friend.

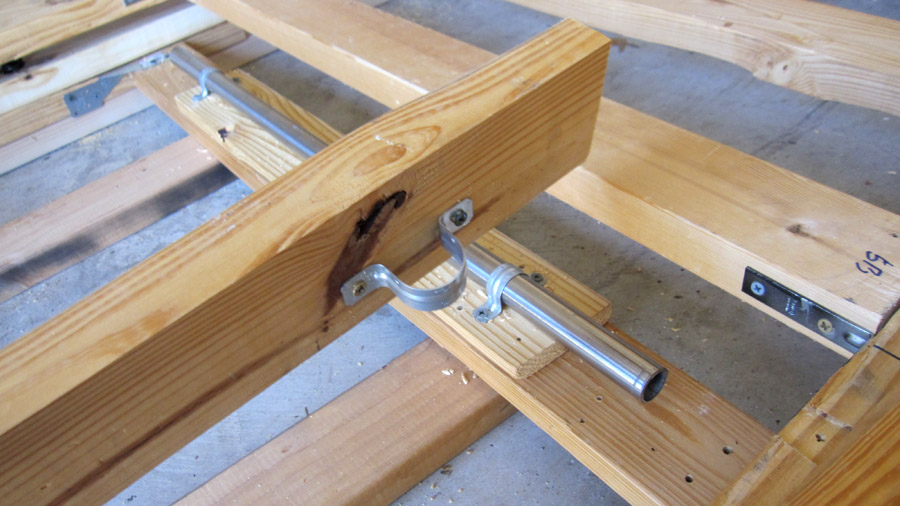
Don't like mathematics? What this says is that if you put the pivot point of your lever in the center like a teeter-totter in a playground, the D1 equals D2 and the heaviest objects wins. But, if you move that pivot point twice as close to the heavier object, that object just lost half of it's force. Move it three times closer, it is now acting like it is only one third of it's weight. Move it ten times closer, and 900 lbs feels like 90 lbs which is much more manageable for what I am trying to do. I found a length of metal pipe in a dumpster at work and cut it into two 3' pieces. I secured each piece to a board using some hardware. Notice that each end of the pipe sticks out a few inches from the board.
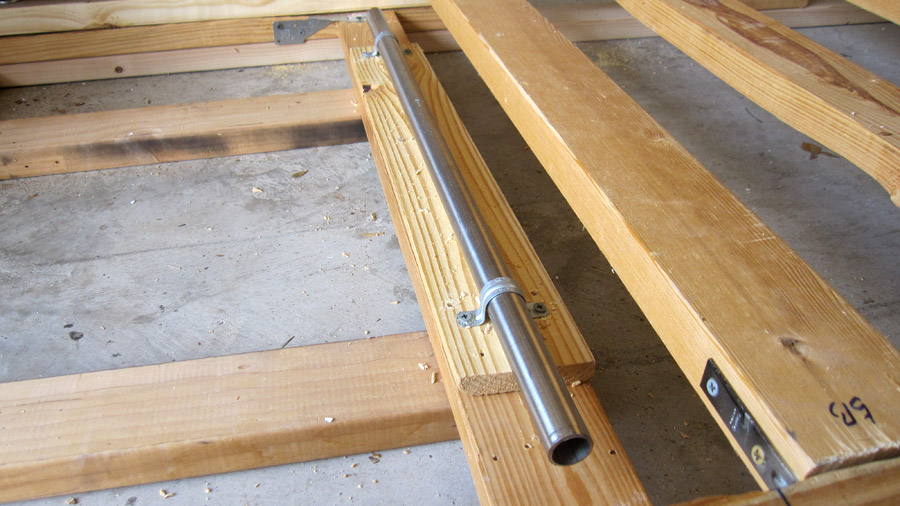
I then attached another pipe clamp to a two-by-four. This clamp, however, was for a 1 1/4" pipe whereas my pipe was one inch. That way the clamp would hold the two-by-four in place, but allow it to pivot around the pipe.
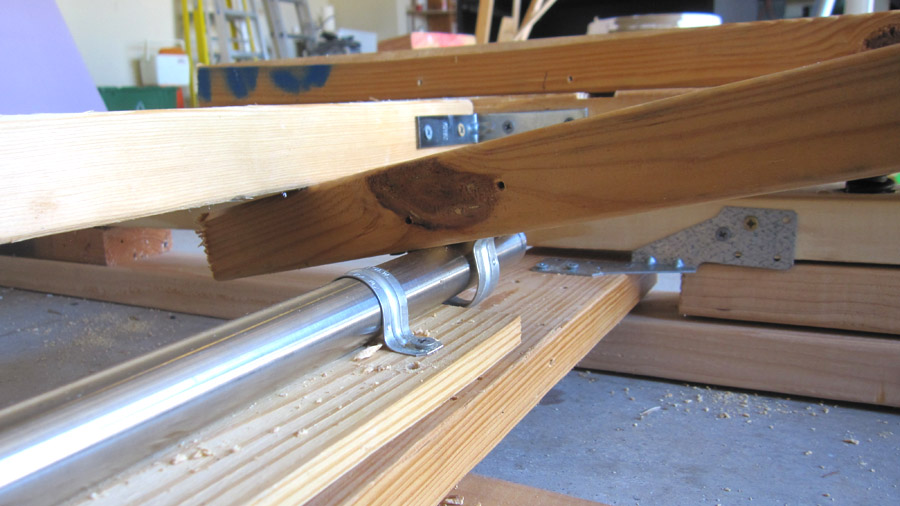
I put another wedge on the other end of the pipe, connected the two boards together and supported the very end of the pipe with a small square of wood. I made one wedge for both sides of the elevator as shown below. Here are several pictures at different stages of construction.


So, I have got my wedge. Now, what do I do with it? I could attach it to a pneumatic piston if I used pneumatics. Since I don't have an air-compressor, I went a bit simpler. I decided to use an electromagnet to hold the wedge down and let my prop controller release the wedge. I bought two electromagnets that could hold 55 lbs each for a total of $30. I thought I could just attach a metal plate to the wedge and put the electromagnet underneath. That didn't work. Any sheer force weakens the magnetic pull and the wedge moves in an arching motion so that unwanted angle was always there. So, I put the metal plate on a wooden block and used a rope and pulley hold the wedge in place. Well, even though the magnet should have been plenty strong enough to hold my weight in the elevator, it couldn't. Fortunately, physics was not out of tricks. I could have made the lever longer, but it would have been too long for my setup. So, I applied a second type of leverage using multiple pulleys.
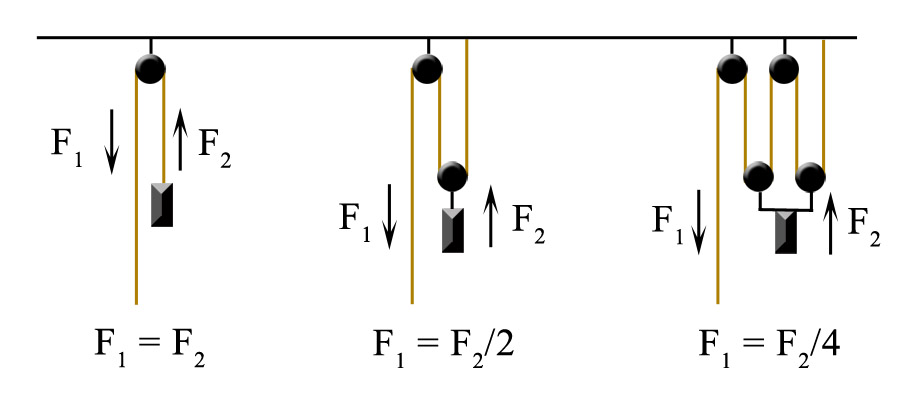
That fixed the issue nicely. I often use multiple pulleys in my setups. Just note that, though you pull only have to pull half as hard, you will need to pull twice as far. Or, in the case below, four times farther.
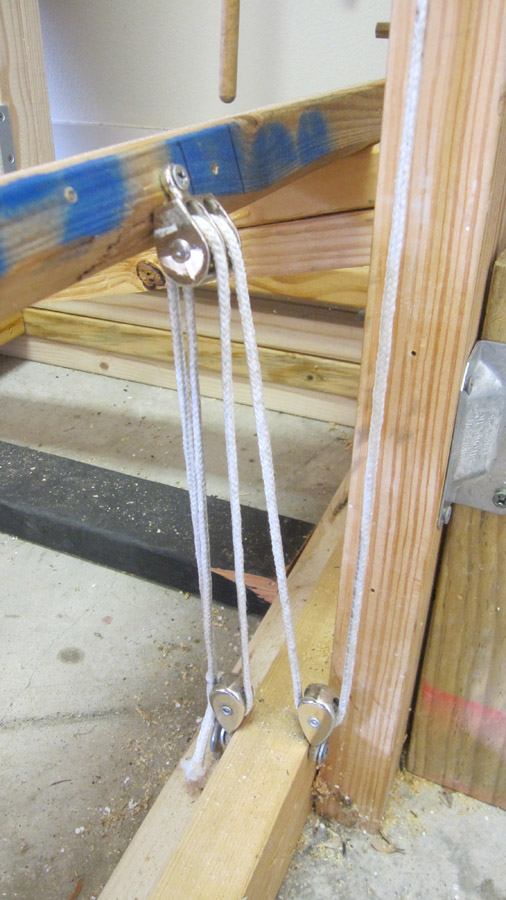
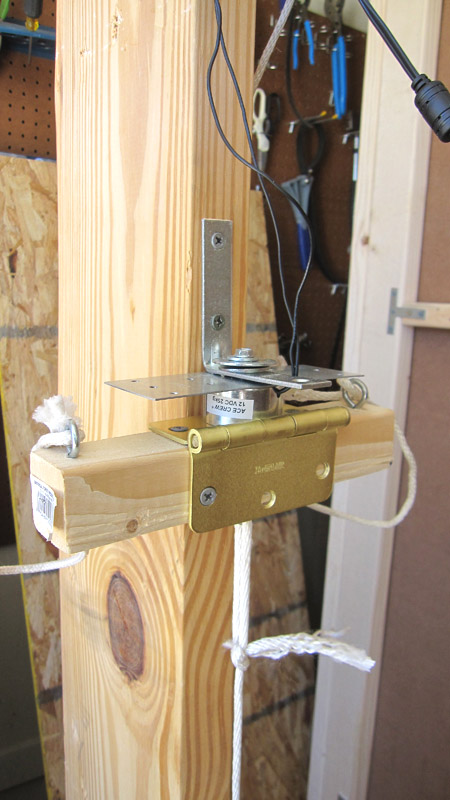
Here is my setup. By the way, the electromagnets get pretty hot so that metal plate on the top is a heat sink. And, yes, that is a door hinge on the wooden block. That was the best hunk of metal I could find that would stick to the magnet.
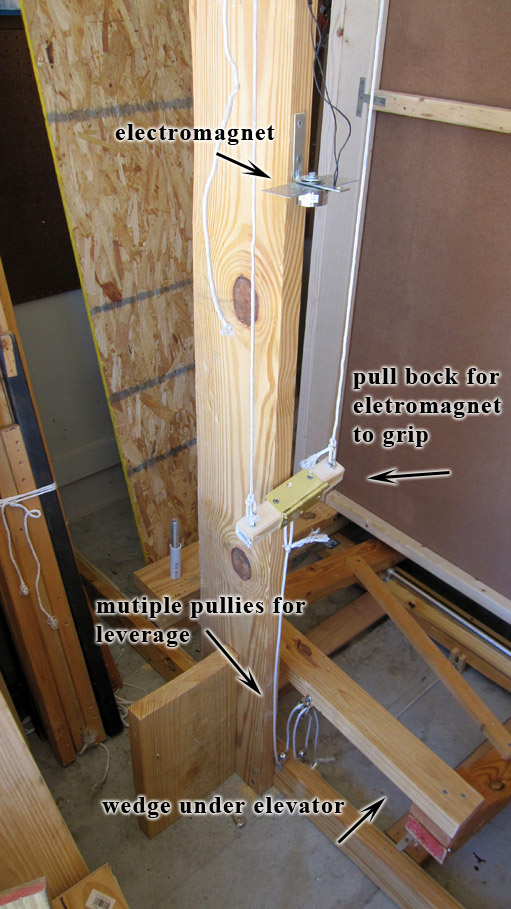
The above picture shows the metal block un-attached to the magnet. I have two cords holding the block up so that it didn't fall to the floor. The next picture shows a close up of the block attached to the magnet.
On to the rotating panels...
Next Page
 Home
Home
Copyright © 2012 Garageofterror.com