Ok, so the haunt would be a walkthrough after all. That meant I now had to figure out how to get the kids out of the bench. Swing the bench back around and move a wall so that they had to take a different path? Kind of boring. I thought it would be fun if the entire bench after rotating would just slide to the right or left to another corridor then let them out. I figured I could do that. I already needed a platform for the bench to rotate around. All I would have to do is put that platform of wheels. But here is the thing… SAFETY. I would have to make this thing sturdy enough to hold about 800+ pounds (two kids, two adults and the structure itself). The bench would have to swing very close to a wall so I wouldn’t want any stray arms to get trapped and broken. And what if a kid stood up while the bench was turning and fell out?
Yes, it is time for the paranoid lecture about safety. Halloween is a strange kind of day and you are inviting all kinds of strangers onto your property. Paranoia is a good thing here. It’s not the things you can think of that is the problem here. It’s the stuff you can’t imagine that is the sticker. I had to think long and hard about how I was going to do this thing safely.
I knew I was going to put up walls on the side but I decided that I would pretty much enclose the bench. That would help to keep arms inside and psychologically keep them in their seats. But, I really felt that I had to put in a lap bar. That would force them to sit down. It also had an additional benefit that I hadn’t realized until I actually got in myself for a test run. It didn’t feel like it was there for safety, it felt like it was trapping you. What was going on it this neighborhood garage that you needed a lap bar?!!!
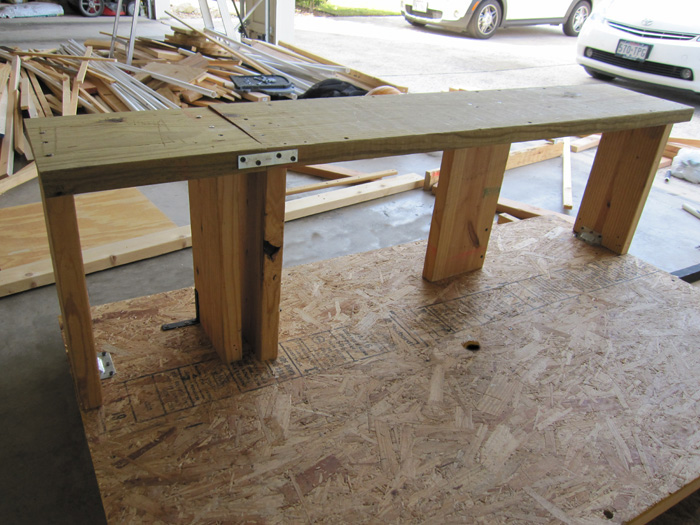
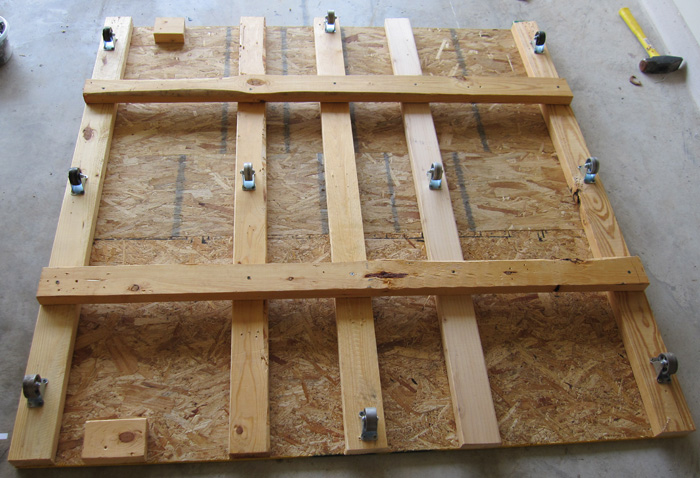
I decided to make the actual bench 5’ long, 17” tall and 1’ deep. I attached it to a 5’ by 3’ platform made from “norboard” (the cheap stuff from Home Depot). This board is not strong enough to hold much weight without flexing so I braced it with a cross work of two-by-fours.
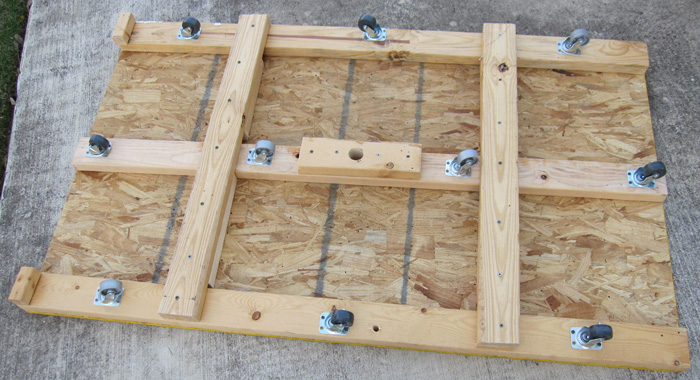
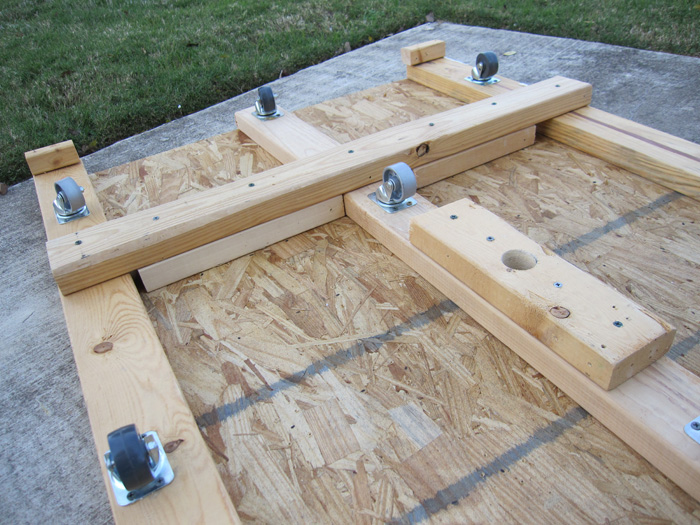
I bought ten 2” swivel castors from Breed & Company for about $3.50 each. They were a bit taller and a bit more expensive than I wanted but the smaller castors didn’t roll smoothly enough. The 5’ x 3’ platform was going to pivot around its center and it was going to b supported by a 5’ x 5’ platform. So I had to arrange the castors so that they would evenly support the weight of the kids, but not roll off the 5’ x 5’ platform as it pivoted. For those of you who thought they would never use the Pythagorean Theorem outside of High School, here is your opportunity to apologize to your Geometry teacher. You will notice that none of the castors are at the very corners of the platform. They are set back about 6". You will also notice the 1 1/8" hole bored down the very center of the platform. The hole goes straight through and will act as the pivot point.
Since I was going to load the kids up from the side of the bench, not the front (there was a wall in the way), I attached the bench at the very edge of the 5’ x 3’ platform. This allowed for a 2’ walkway to the far end of the bench.
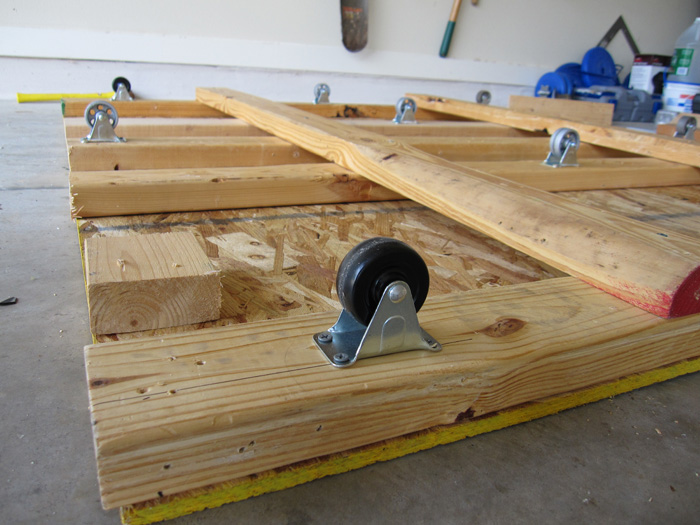
I bought another set of 2” castors for the 5’ x 5’ platform. These where the type that did not swivel. I attached them to the underside of the (braced) platform.
So, I have my two platforms. The last thing I needed was my pivot. Sorry, I here is where you will probably get mad at me. A strong pivot is pretty important to the function and safety of this project and I got my pivot out of the dumpster at work. What I used is not the kind of thing you can find at the hardware store and, for liability reasons, I am not going to make any suggestions as to what you could use instead. Just make sure it is something at least four inches tall and can SECURELY attach to the base platform. I don’t think a wooden dowel glued to the platform will do the job here. You need some circular hunk of metal that you can bolt or screw down. It would be a disaster if your pivot broke or let go and your kids went rolling off the platform. Ask someone at the hardware store for ideas.
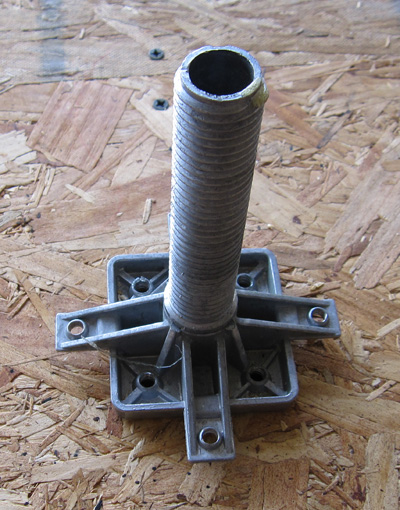
I attached my pivot to the very center of the base platform and also attached two stops at one end. The stops stop the bench rotation after it turns 180 degrees. I placed a short piece of 1" PVC pipe over the pivot to act as a bearing.
NEXT