As I mentioned elsewhere, my original idea with the spines would be these long, lanky bones that would loom high over the kids' heads. I figured I could operate them like a marionette puppet from above. I had success with this approach with my candy-dispensing spider. The issue was that my garage ceiling was only 10 feet high and it would take only one tall kid to jump up and grab a spine to destroy the whole thing. Then, I found some discarded teflon tubing at work about the same time I was wondering if I could ever hope to make a halfway-descent bone with foam board and my newly acquired Dremel. Then it came to me. Do the exo-skeleton thing. Use internal tendons to make the bones move. This project did take some time and planning, but primarily because I had to make FOUR of these things and I was a newbie when it can to using a Dremel.
Each spine had three sections. I will show each separately. All three were made from 4 layer sandwiches of half-inch foam board, with some internal structure. So, when you see a shape below cut in foam board, you really need to cut four of those shapes to glue together. Since there are four spines, you actually need to cut 16 of them.
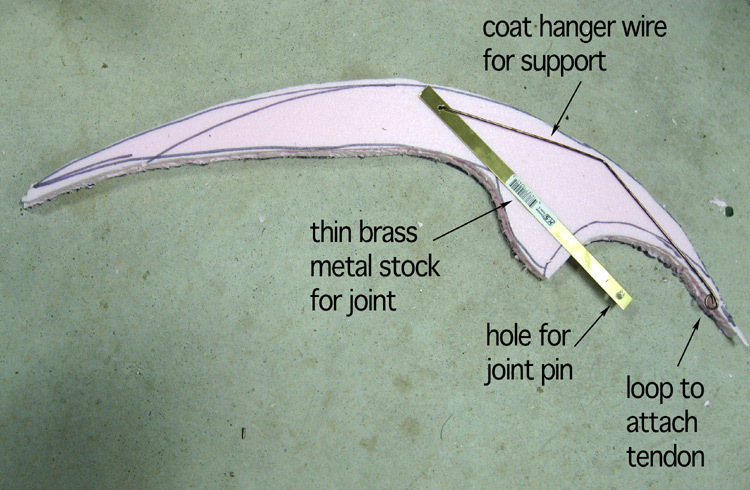
It is important to make these in order so that everything matches up. Start with the claw and work your way back. I wanted a curved claw like that of a crab leg (yes, my fortune teller got the nickname of "Darth Lobster"). I could have added serrations here if I wanted but I decided against those. Anyway, you can see a coat hander wire with a loop running most of the length of the claw and terminating at the tip of the spine with a loop. The tendon will be tied to this loop. For the joint, I used a thin, brass metal stock that I got at a hobby shop. This metal is used to make model airplanes. I chose it because it was cheap and I thought it would be easy to drill through (I am not experienced in metal work). Choosing this material was a mistake. It was too flimsy to support the entire assembly and I later had to add additional supports. Go with something stiffer even though it will be harder to drill your hole. I let the metal stock extend about three inches from the edge of the foam board. When you cut your shape, remember that you will be carving this down so make it bigger than you need. I cut a shallow wedge in the foam board to recess the coat hanger wire and glued two layers together with polyurethane glue. Once the two layers dried, I glued the other two layers to make the thing four layers thick (the metal stock stuck out at the center of the stack). Sorry I seem to have forgotten to take pictures of the intermediate stack. Anyway, once everything was dry, I carved away with my new Dremel (I was covered in little flecks of pink foam. You should have seen my wife's face) and sanded the claw smooth with fine sand paper.
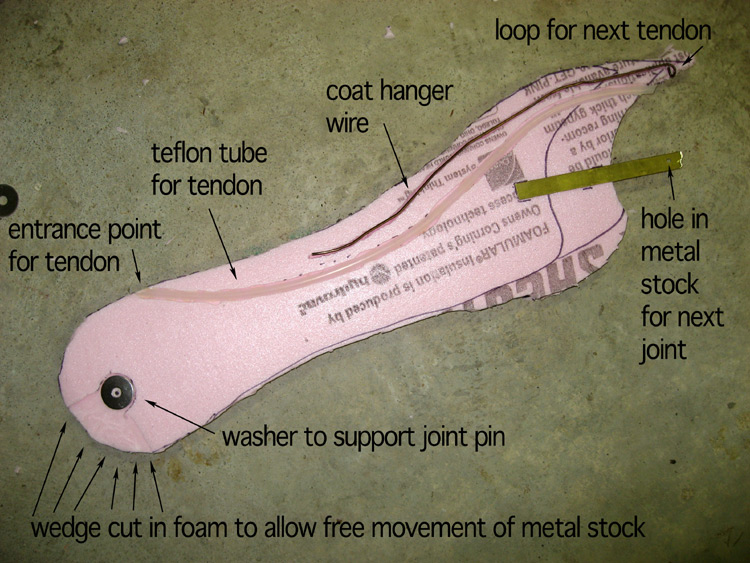
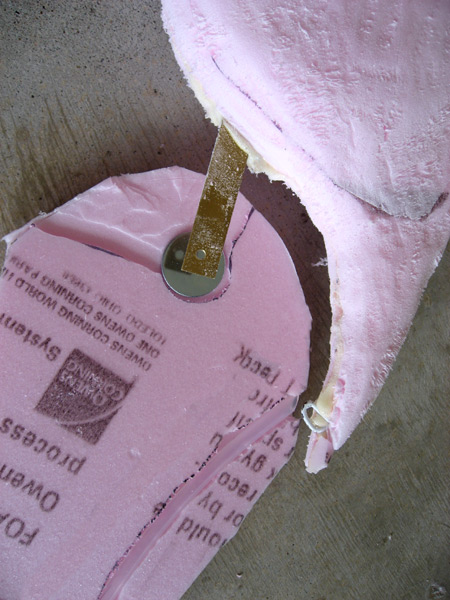
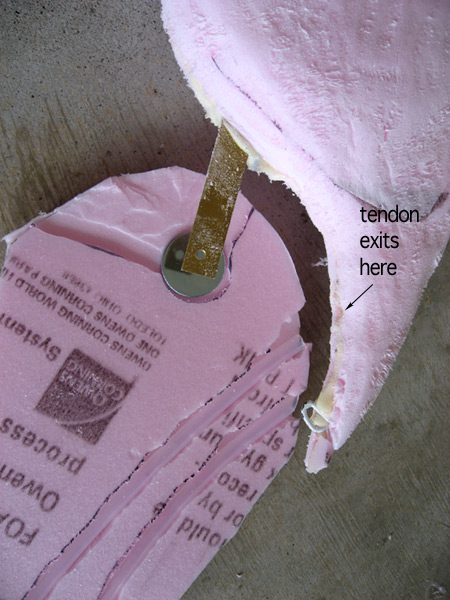
You must make two measurements before you can make this second piece. You need to align the washer to the hole in the metal stock sticking out of the claw you just made. Once you have done that, you need to match up the entrance point of the tendon with the wire loop on the claw's spine (see the picture below). The rest you can improvise. Using the cutting guide that came with my Dremel, I carved a shallow wedge in an arc shape at the washer so that the metal stock wouldn't rub as the joint flexed. I also added a second washer to the layer opposite of this one. That way, the metal stock would be sandwiched between two metal washers. The metal washers are important because the joint pin would just cut through the foam without their support. Since the urethan glue expands before it dries, use it sparingly around the washers. When I was ready to glue the two pieces together, I inserted the joint pin (without gluing it) to make sure the holes of the two washers lined up. The joint pin, by the way, is simply a short, straight piece of coat hanger wire.
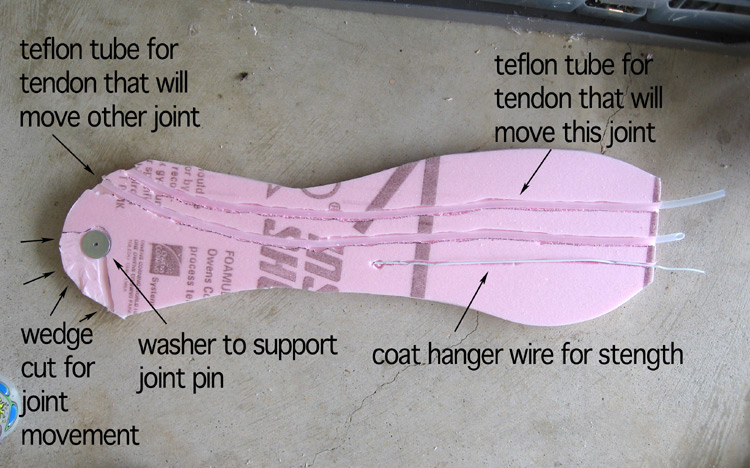
You must make three measurements before you can make the last piece. You need to align the washer to the middle joint just like you did with the claw. But now, you have two tendons to align. The inner tube will hold the tendon that runs all the way to the claw. The other tube will hold the tendon that will move the center bone. The rest is just a duplicate of what you just did.
Next Page